Table of Contents
Edit Business Logic
Edit Business Logic feature enables you to modify and fine-tune existing business logic based on your changing business requirements, addressing issues or bugs, optimizing performance, and refining the web application's behavior over time.
To Edit Business Logic Operation
- Go to the required Web Applications > Edit > Business Logic.
- In Business Logic, click on Edit icon
 , you will be redirected to the Business Logic Editor and do the required business logic operation edits.
 - Click on Save to proceed with saving the business logic operation after you complete the necessary edits.
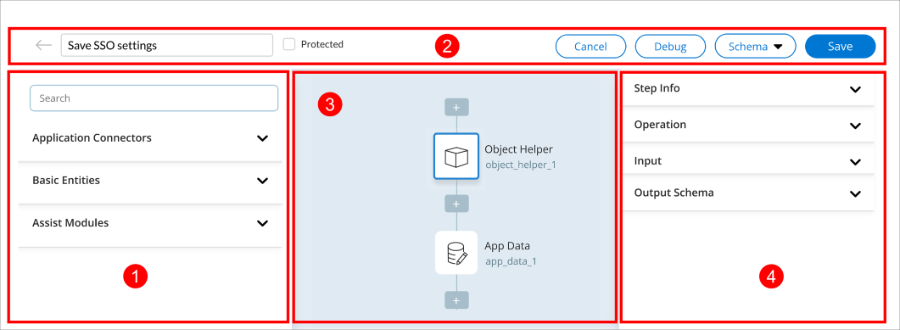
Business Logic Editor
| Items | Description |
|---|---|
 |
The left pane of the business logic editor includes the predefined Web Application Connectors, Basic Entities, and Assist Modules along with a search functionality for easy use. These are some of the popular samples available for you to easy access in business logic editor.
|
 |
The top pane includes the following options.
|
 |
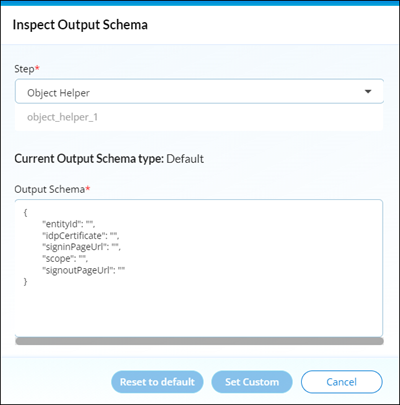
In the center pane, you can design the business logic. Drag and drop the desired elements from the left pane to proceed with the business logic operation edit. Drag and drop the desired application connectors, basic entities or assist modules from the left pane to proceed with the business logic operation edit and associate with the necessary Properties pane actions. |
 |
The Properties pane contains a list of properties to consider when developing the web application page layout.
|